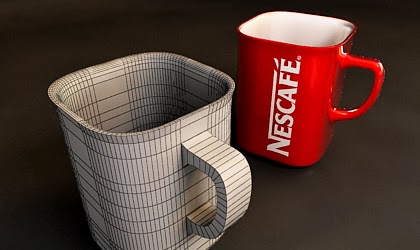
Hello again..this time we’re gonna create a nescafe mug. In this tutorial you will learn a couple of 'Editable Poly' features like 'Extrude', 'Chamfer', 'Connect', 'Hinge From Edge', 'Bridge' and 'Inset'. Let’s go the step 1.
1.Go to 'Create' tab, click 'Geometry' and create a 'Box'. Set its parameter Length:55, Wide:55, Height:70 and all segment is 1.
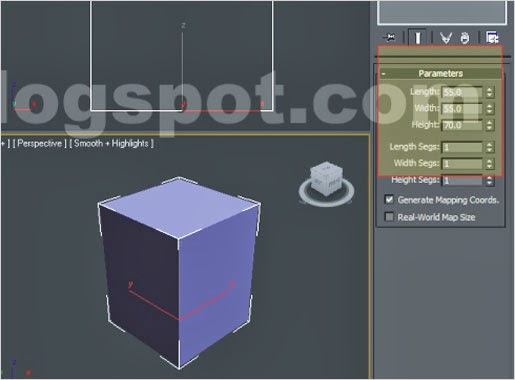
Pic. 01
2.Convert the box to an editable poly by right clicking it and select 'Convert to an Editable Poly'.
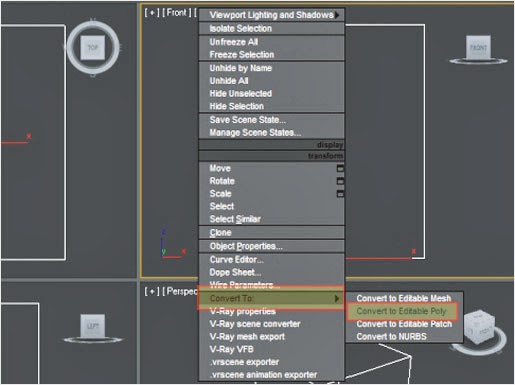

Pic. 02
3.Select these 4 edges, and chamfer it with an amount 20 and segment 20.
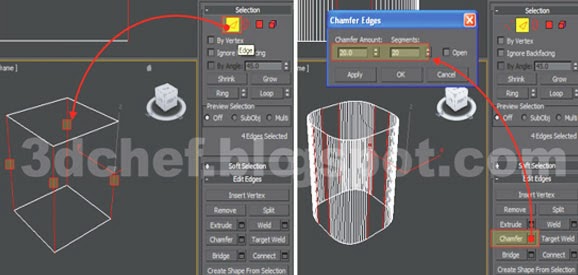
Pic. 03
4.Select these edges, and connect with 10 segment.
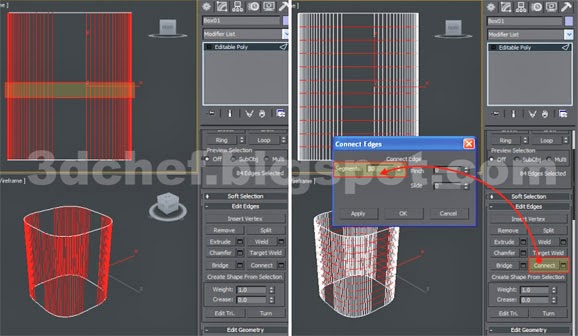
Pic. 04
5.Select these edges, and connect with 2 segment.
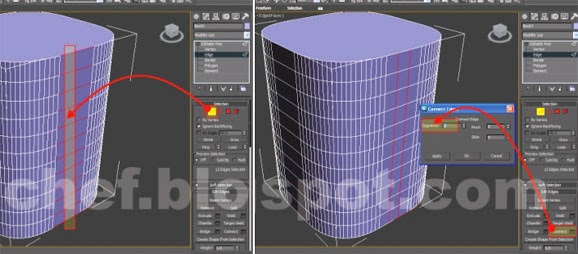
Pic. 05
6.Change to a vertex selector. Select these vertexs and scale it in x direction to get its distance more wider.
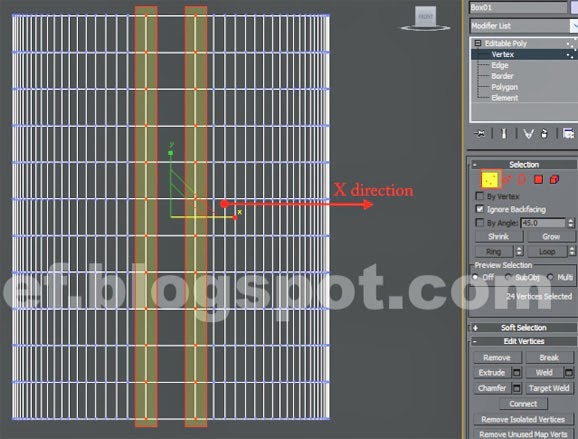
Pic. 06
7.Change to a polygon selector, select these two polygons and inset it with an amount 0.5.
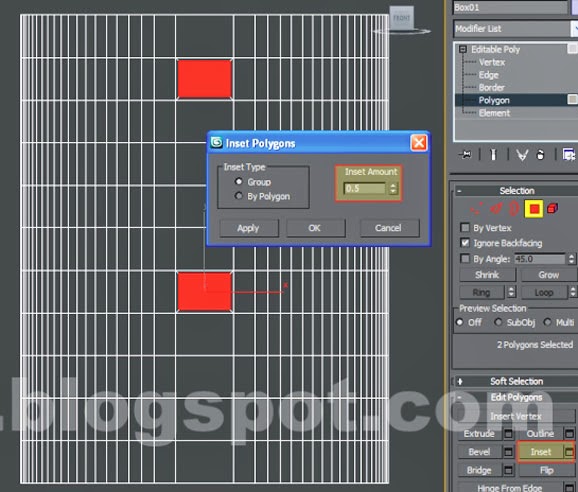
Pic. 07
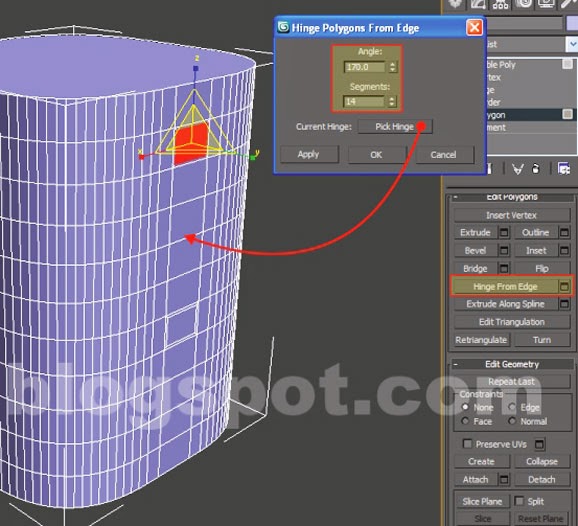
8.Select the first polygon that have inset before, click ‘Hinge From Edge’ modifier from ‘EditPolygons’rollout menu. Sets the parameter : Angle : 170, Segment 14 then pick the hinge, see pic.08.
Pic. 08
Another detail for 'Hinge From Edge' explanation, you can find it here :
Poly Modifier 'Hinge From Edge'
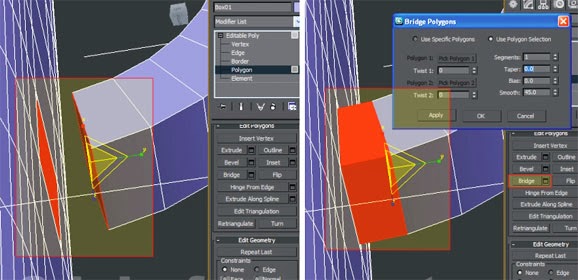
9.Next we’re gonna connect the handle to a mug body. Pick these two polygons (see pic.09) then click 'Bridge' button.
Pic. 09
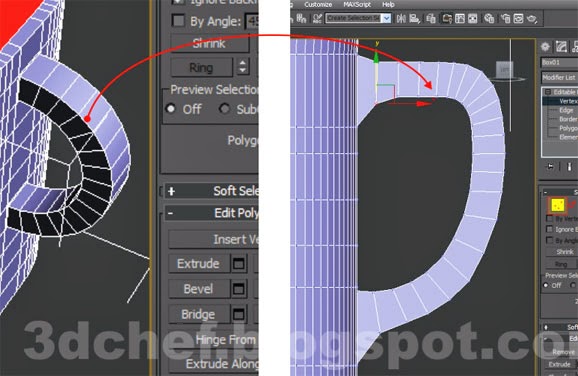
10.Modify the shape of the handle using ‘select and move’ tool by move the vertex in x-y direction.
Pic. 10
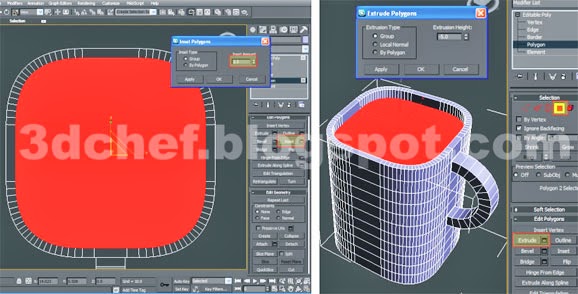
11.Select the top polygon of the mug, 'Inset' it with an amount 2.5 then extrude it with height -7 for ten times.
Pic. 11
12.Select the bottom polygon of the mug, select the edges and 'Chamfer' it with an amount 2 and 3 segment.
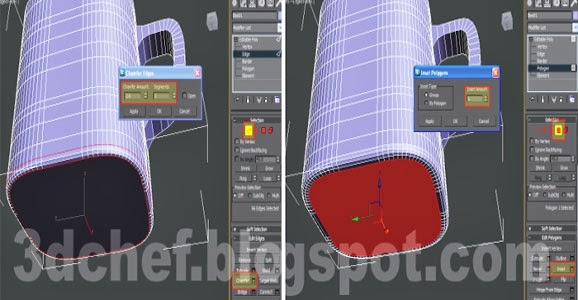
Pic. 12
13. Extrude the polygon with an amount 1.
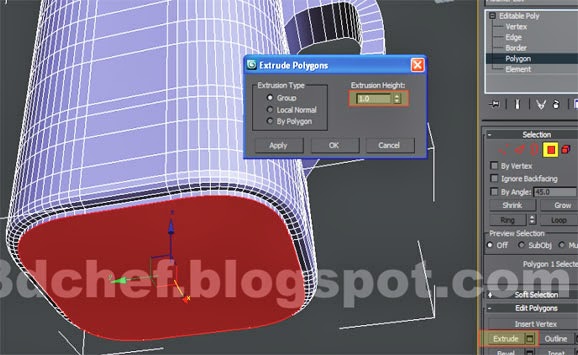
Pic. 13
14. Select the first and second row vertex from the top of mug and scale it. See pic.14.
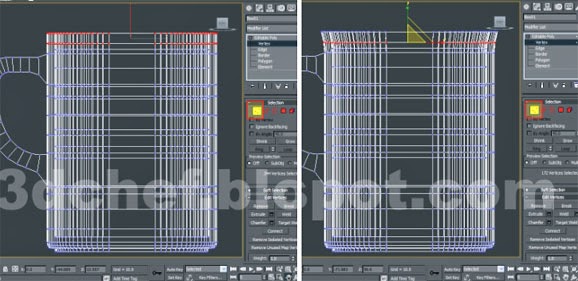
Pic. 14
15. Select an inner edge of a top mug and chamfer it with an amount 2 and 5 segment.
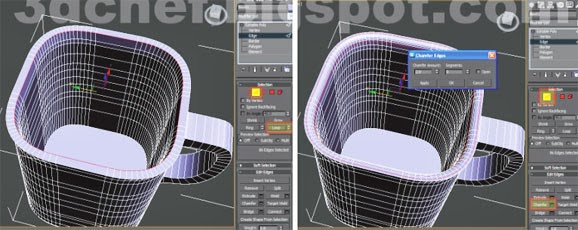
Pic. 15
16. Select an inner edge of a mug bottom and chamfer it with an amount 5 and 5 segment.
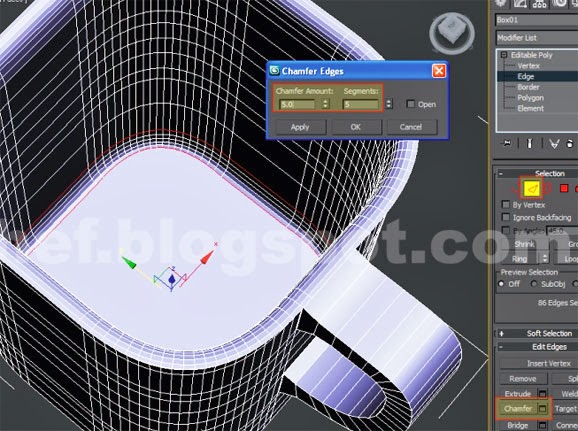
Pic. 16
17. Finish this mug model with 'Turbosmooth' modifier with iterations 1. See the result in pic.17.
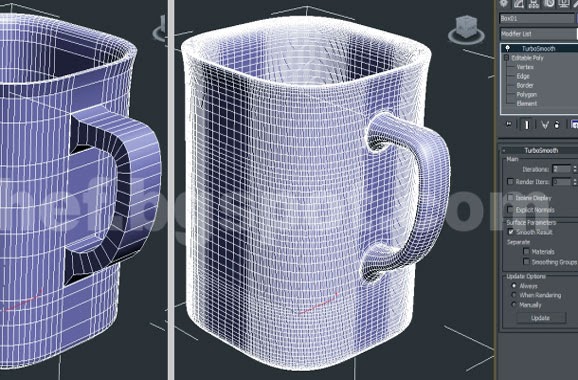
Pic. 17
18. Thats a wrap, see you again in next tutorial.


im having some trouble with "hinge from edge" im using 3ds max 2013 can you explain more about that part.
ReplyDeleteI've never try it in 3ds max 2013 yet, but it could be still the same way as i explain..try again maybe you missed the step..thanks.
ReplyDeleteThanks for this amazing Tutorial
ReplyDeleteDownload Free Daz3d | Renderosity | Runtimedna Models
Thanks for a wonderful share. Your article has proved your hard work and experience you have got in this field. Brilliant .i love it reading. UKCoffeeMachines.co.uk
ReplyDelete