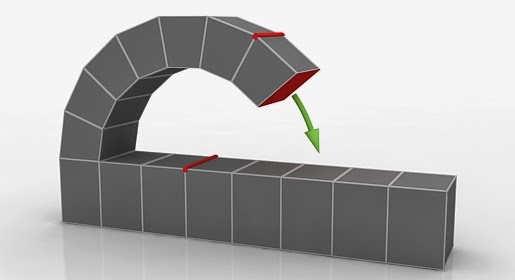
'Hinge From Edge' is one of editable poly modifier, It's essentially an extrusion with rotation, with one exception: If the hinge edge belongs to a selected polygon, that side is not extruded. The manual 'Hinge From Edge' version of works only with an existing polygon selection. In this tutorial, i'll show how it works, let's go to step 1.
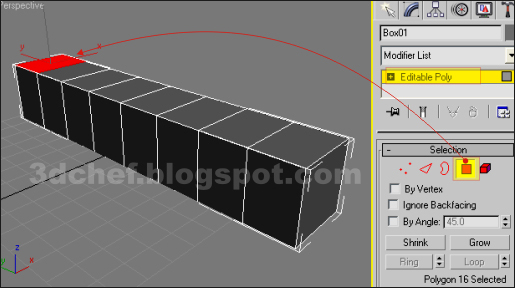
1. Create a 'Box', set its parameters. Length:160, Width:28, Height:28, Length Segs:8 and the rest is by 3ds max default.

Fig. 01
2. Convert the box to an 'Editable Poly' by right clicking it and select 'Convert to Editable Poly'.

Fig.02
3. Select the poly and go to 'Modify' tab, turn on the 'Polygon' selector. Select one polygon at the corner.

Fig. 03

Fig.04

Fig.05
6. Click 'Apply' button six times.

Fig. 06
7. Below is explanation about this modifier.
Angle : Quantifies the rotation about the hinge. You can hinge selected polygons outward or inward, depending on whether the value is positive or negative.
Angle : Quantifies the rotation about the hinge. You can hinge selected polygons outward or inward, depending on whether the value is positive or negative.
Segments : Specifies the number of polygons into which each extruded side is subdivided. This setting also applies to manually hinged polygons.
Current Hinge : Click Pick Hinge, and then click an edge to be the hinge. After you designate a hinge, the “Pick Hinge” button text is replaced with “Edge #” where # is the ID number of the hinge edge.
All subsequent hinge operations created via the dialog will use this hinge. To hinge multiple polygons, each from one of its own sides, you must reselect the hinge each time.
Apply : Applies the settings to the current selection, retaining them if you then make another selection.
OK : Applies the settings to the current selection and closes the dialog.
Cancel : Closes the dialog without applying the settings to the current selection. Does not reverse previous uses of Apply.
Fig.07
8. That's it, thanks for reading, keep visiting my blog.


0 comments