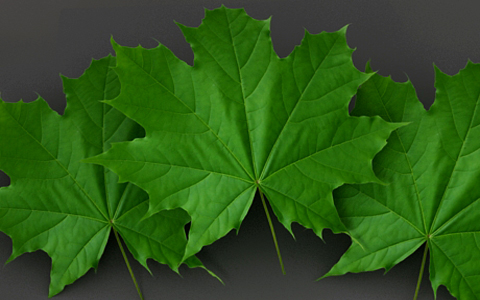
Hello again..this time I'm gonna show you how to create a leaf using 3ds max VRay opacity, its simple but useful to make a faster modeling. Let's go to step 1.
1. Go to a top view, create a plane, sets its parameters, see Fig.01.
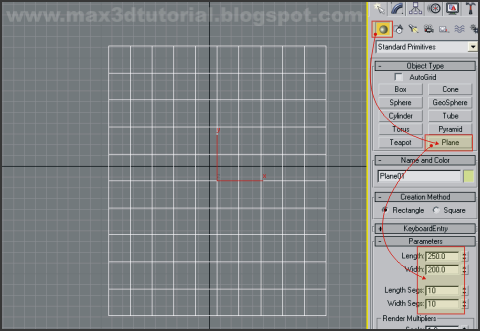
Fig.01
2. Go to left view, select the plane and click the modify tab. Expand the ‘Modifier List’ roll out, scroll down and select ‘FDD 4x4x4’.
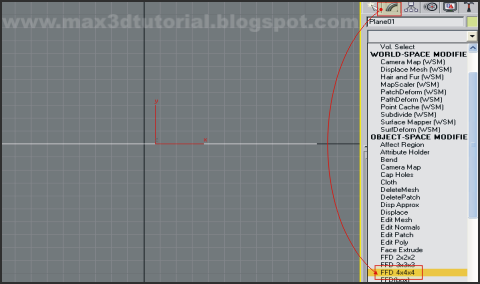
Fig.02
3. Still on left view, select the plane. On a ‘modify’ tab menu, expand the ‘FFD 4x4x4’ modifier and select the two control points in the middle (see fig.03), then pull it up. I use this FFD modifier to make the shape of a leaf or make it a little bit curvy.
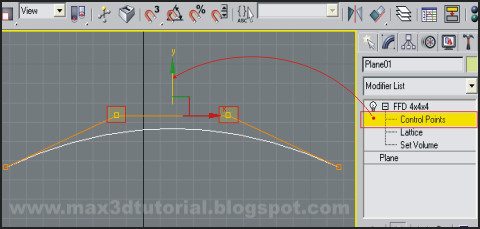
Fig.03
4. Go to ‘Perspective’ view, select the plane and convert it to an editable poly by right clicking it and
select ‘Convert to Editable Poly’.
select ‘Convert to Editable Poly’.
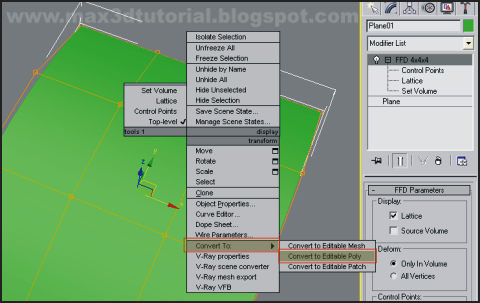
Fig.04
5. Now we’re gonna create the material for the leaf. Go to ‘Material Editor’ or push ‘M’ button for keyboard shortcut. On a material editor window, create a VRay Material, see fig.05.
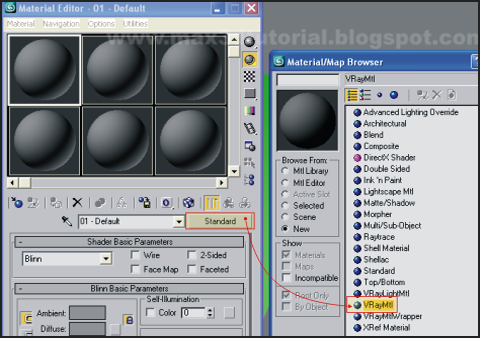
Fig.05
6. To make this ‘Material’, we need to have these three bitmaps first. The colored one is for the 'Diffuse’, the second is for the opacity and the last is for ‘Bump’. For my example, I'm gonna use a maple leaf as the object, sure you can make another leaf you want.

Fig.06
7. Still in ‘Material Editor’, select the ‘VRay Material’ that we’ve made before and click the square diffuse button. It’s gonna pop up the ‘Material/Map Browser’ window, then select ‘Bitmap’.
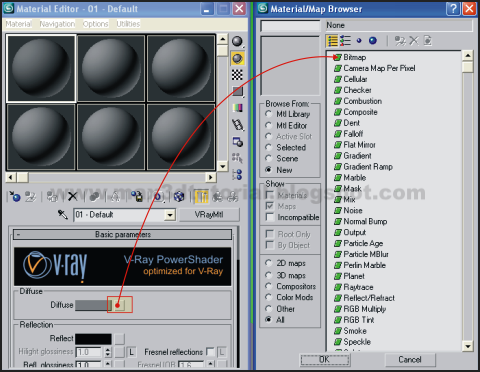
Fig.07
8. Continue to Step 8 in =====> PART 2.


Cool, thanks for the tuts..great work!
ReplyDelete