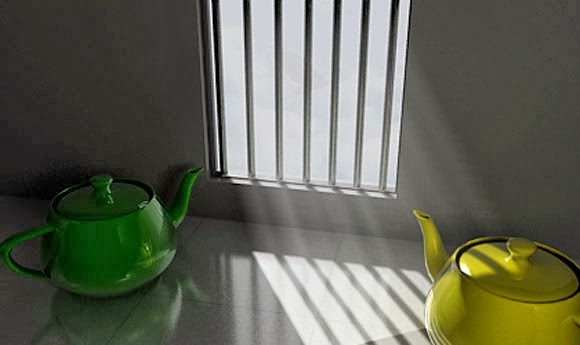
Hello friends...In this tutorial I will show you how to create 'Volume Light in 3D Studio MAX' and ..
rendered with 'V-Ray'. Volume Light is a light effects based on the interaction of lights with the atmosphere around it. For example is when the light is shine through the window to a closed dusty room, it will create a kind of fog effect that very nice for your room scene. Wanna see how we’ll create it ? Let’s go to step 1.
1. Create a scene, it's a room with a window. For this example, I make a room with one window and there’s a two teapot inside.


Fig. 01
2. Go to front view and create a 'Direct Light'. The target is inside of the room, it's from outside and through the window. See Fig. 02.
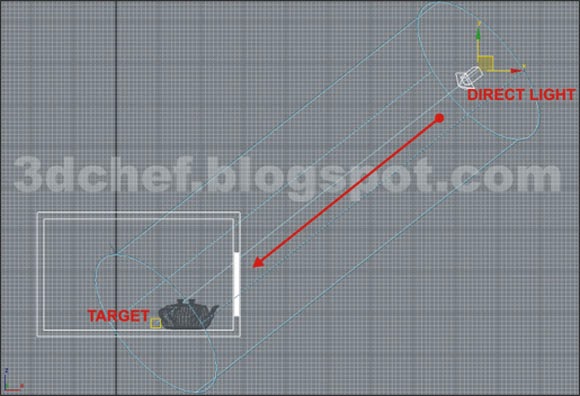
Fig. 02
3. Click the 'Direct Light', go to modify tab and change the parameter of the light. Turn the shadow ON, choose 'Shadow Map' for the shadow type, and set the light 'Multiplier' into 2 or as your experiment. See Fig.03.
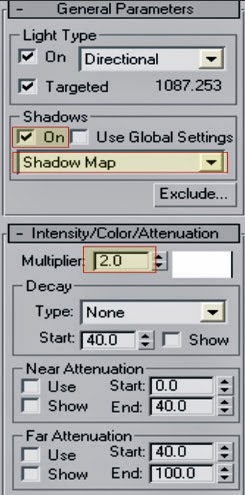

Fig. 03
4. Scroll down, find and click 'Atmosphere and Effect' tab. Click 'Add' button and select 'Volume Light'. See Fig.04.
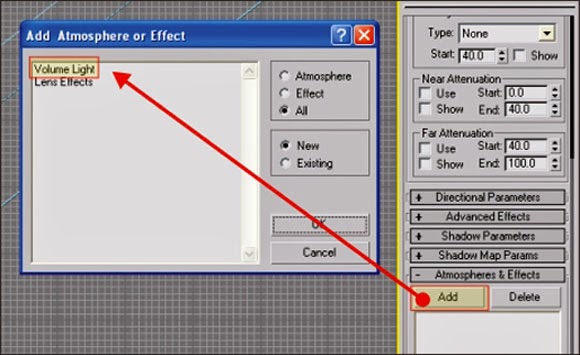
Fig. 04.
5. Select the 'Volume Light', click 'Setup' button and sets its parameter. For my example I just modify the 'Density' amount to 1.5, tag the 'Use Attenuation Color' check box and the rest is Default by 3Ds Max. You can improve to get the best result by modifying the parameters. 'Density' is for how much the fog will come out and 'Use Attenuation Color' is to make the fog more lighter or softer.
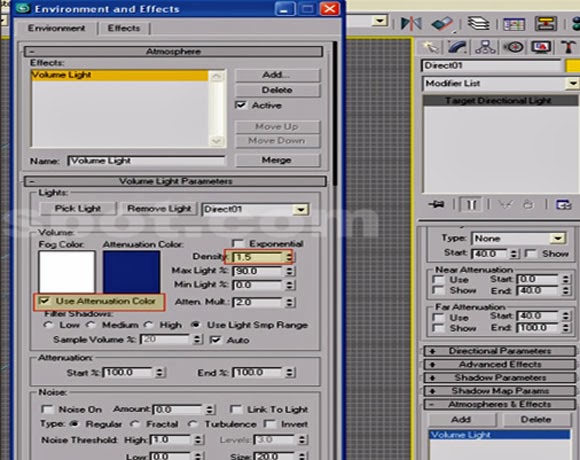
Fig. 05.
6. You can add 'Noise On' to make the fog more rough by modifying the 'Amount' and change how big the roughness you want by modifying the 'Size'.
7. After we've done with the 'Volume Light' setup, go to perspective view and hit 'Render'. For my example, here’s the result (Fig. 06).


Fig. 06
8. That’s the end of this tutorial. Hope it’s useful for you, thanks for your visit. Gracias :)


Great tutorial..
ReplyDeletewell done
ReplyDeleteThanks for the tutorial.
ReplyDelete