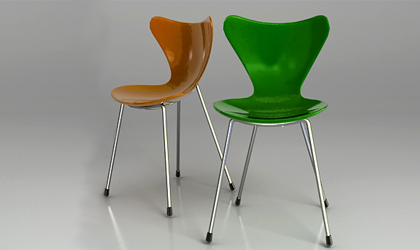
Hallo...this time we’re gonna create a chair. In this tutorial you will learn a couple of an Editable Poly features and a little bit about splines. Let’s go the step 1.
1.In a top view, go to 'Create' tab, click 'Geometry' and create a 'Box'. Set its parameter Length:80, Wide:60, Height:2, Length Segs:15, Width Segs:15 and Height Segs:1.
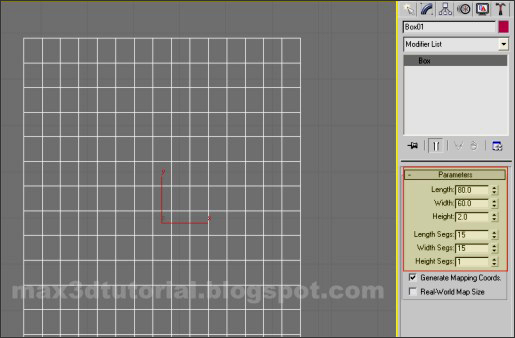
Fig.01
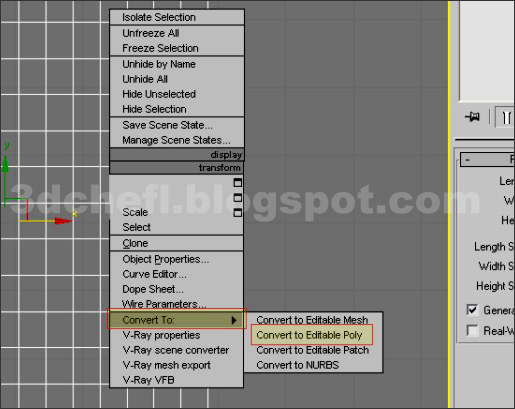
Fig.02
3.Still on top 'Viewport', set this JPG as its background. You can make the JPG yourself, or you can download here. We’re gonna use this JPG as a template to modify the editable poly that we have made. But this step its an optional, you can use this step to make it easier or you can modify the editable poly instinctly without a template.


Fig.03
4.Set the 'JPG' as a background. To do this, just go to 'Top Viewport', in main 'Tabs' window click 'Views', choose 'Viewport Background'.
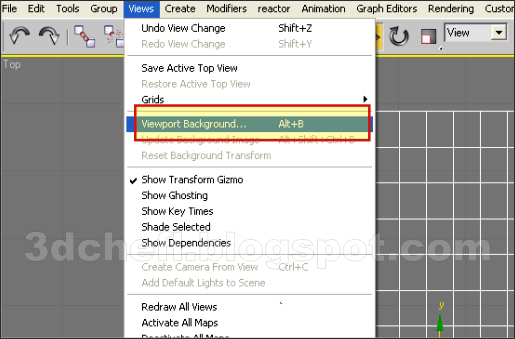
Fig.04
5.Select the 'JPG' file.
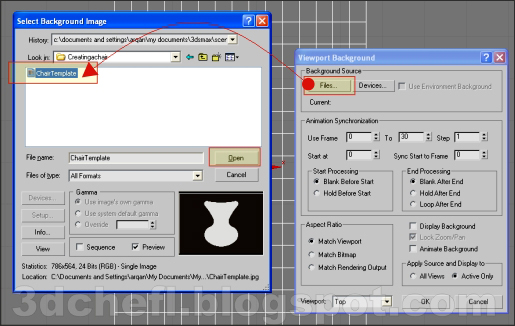
Fig.05
6.See Fig.06, that we’re gonna see on the top viewport.
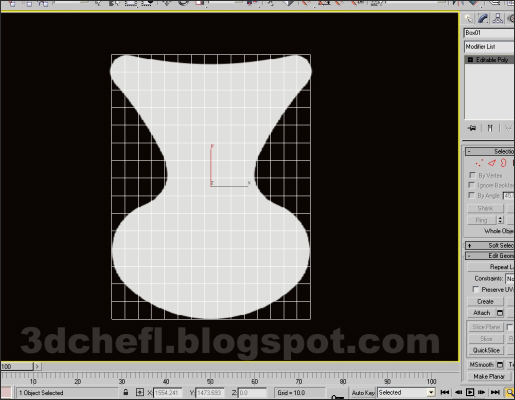
Fig.06
7.Click the poly and go to 'Modify' tab. Select a 'Vertex' selector and modify the vertex using 'Select and Uniform Scale'. See Fig.07.
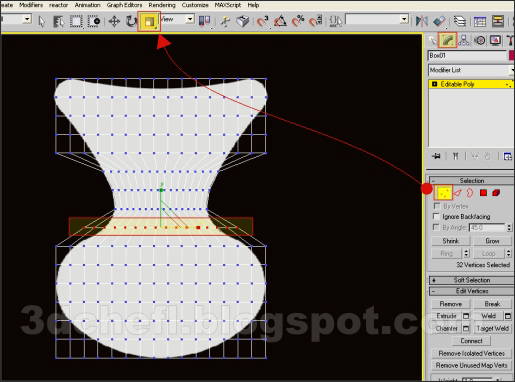
Fig.07
8.Keep modifying the 'Vertex' position until all the vertexs are match to the the template contour (the JPG).You can use the 'Select and Move' tool to drag the top and bottom vertexs.
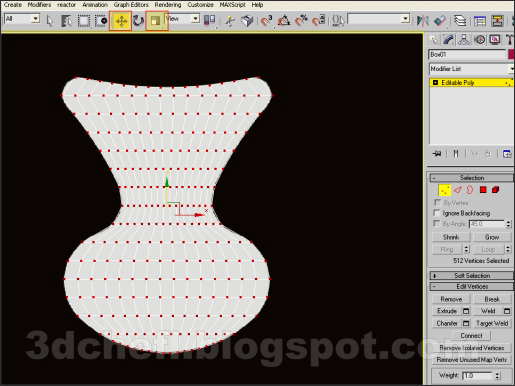
8. Continue to < Part 2 >.

Fig.08


nice....
ReplyDeleteHello, Where is part 3? The tutorial for creating the legs.
ReplyDeleteIt's on progress..maybe take a few day..thanks.
ReplyDeletevery easy technic to model such a complex object. thank you
ReplyDeletevery goods
ReplyDelete